Perhaps you're on your church's Social Committee and thus responsible to help plan monthly social events for your group in the coming year. Maybe you've signed up to man (or woman) a booth at a Fall Fun Fair that your youth group is putting on as a fundraiser. It could be you're a teacher in your Sunday School's primary department, and you're in charge of planning some games/activities for the children at the annual summer picnic next month.
If you find yourself in these scenarios (or similar situations), you may be on the lookout for ideas of activities that occupy, or at least include, children. I have four to offer you. Ideas, that is, not children. They are: Kiddie Pool Fishing, Mystery Photos, Photo Scavenger Hunt, and Four Stations. (Bible character studies)
These are activities that I have implemented at social events in the past year, and I'm happy to share the ideas. And if it works for you like it does for me, sometimes just seeing others' ideas - even if they aren't suitable for the moment - can generate other ideas that do work for you. You're welcome to use anything from this post that would be a benefit to you! Following is a detailed tutorial of the pool (noodle) fishing idea, as well as shorter descriptions of the other three activity suggestions.
Kiddie Pool Fishing
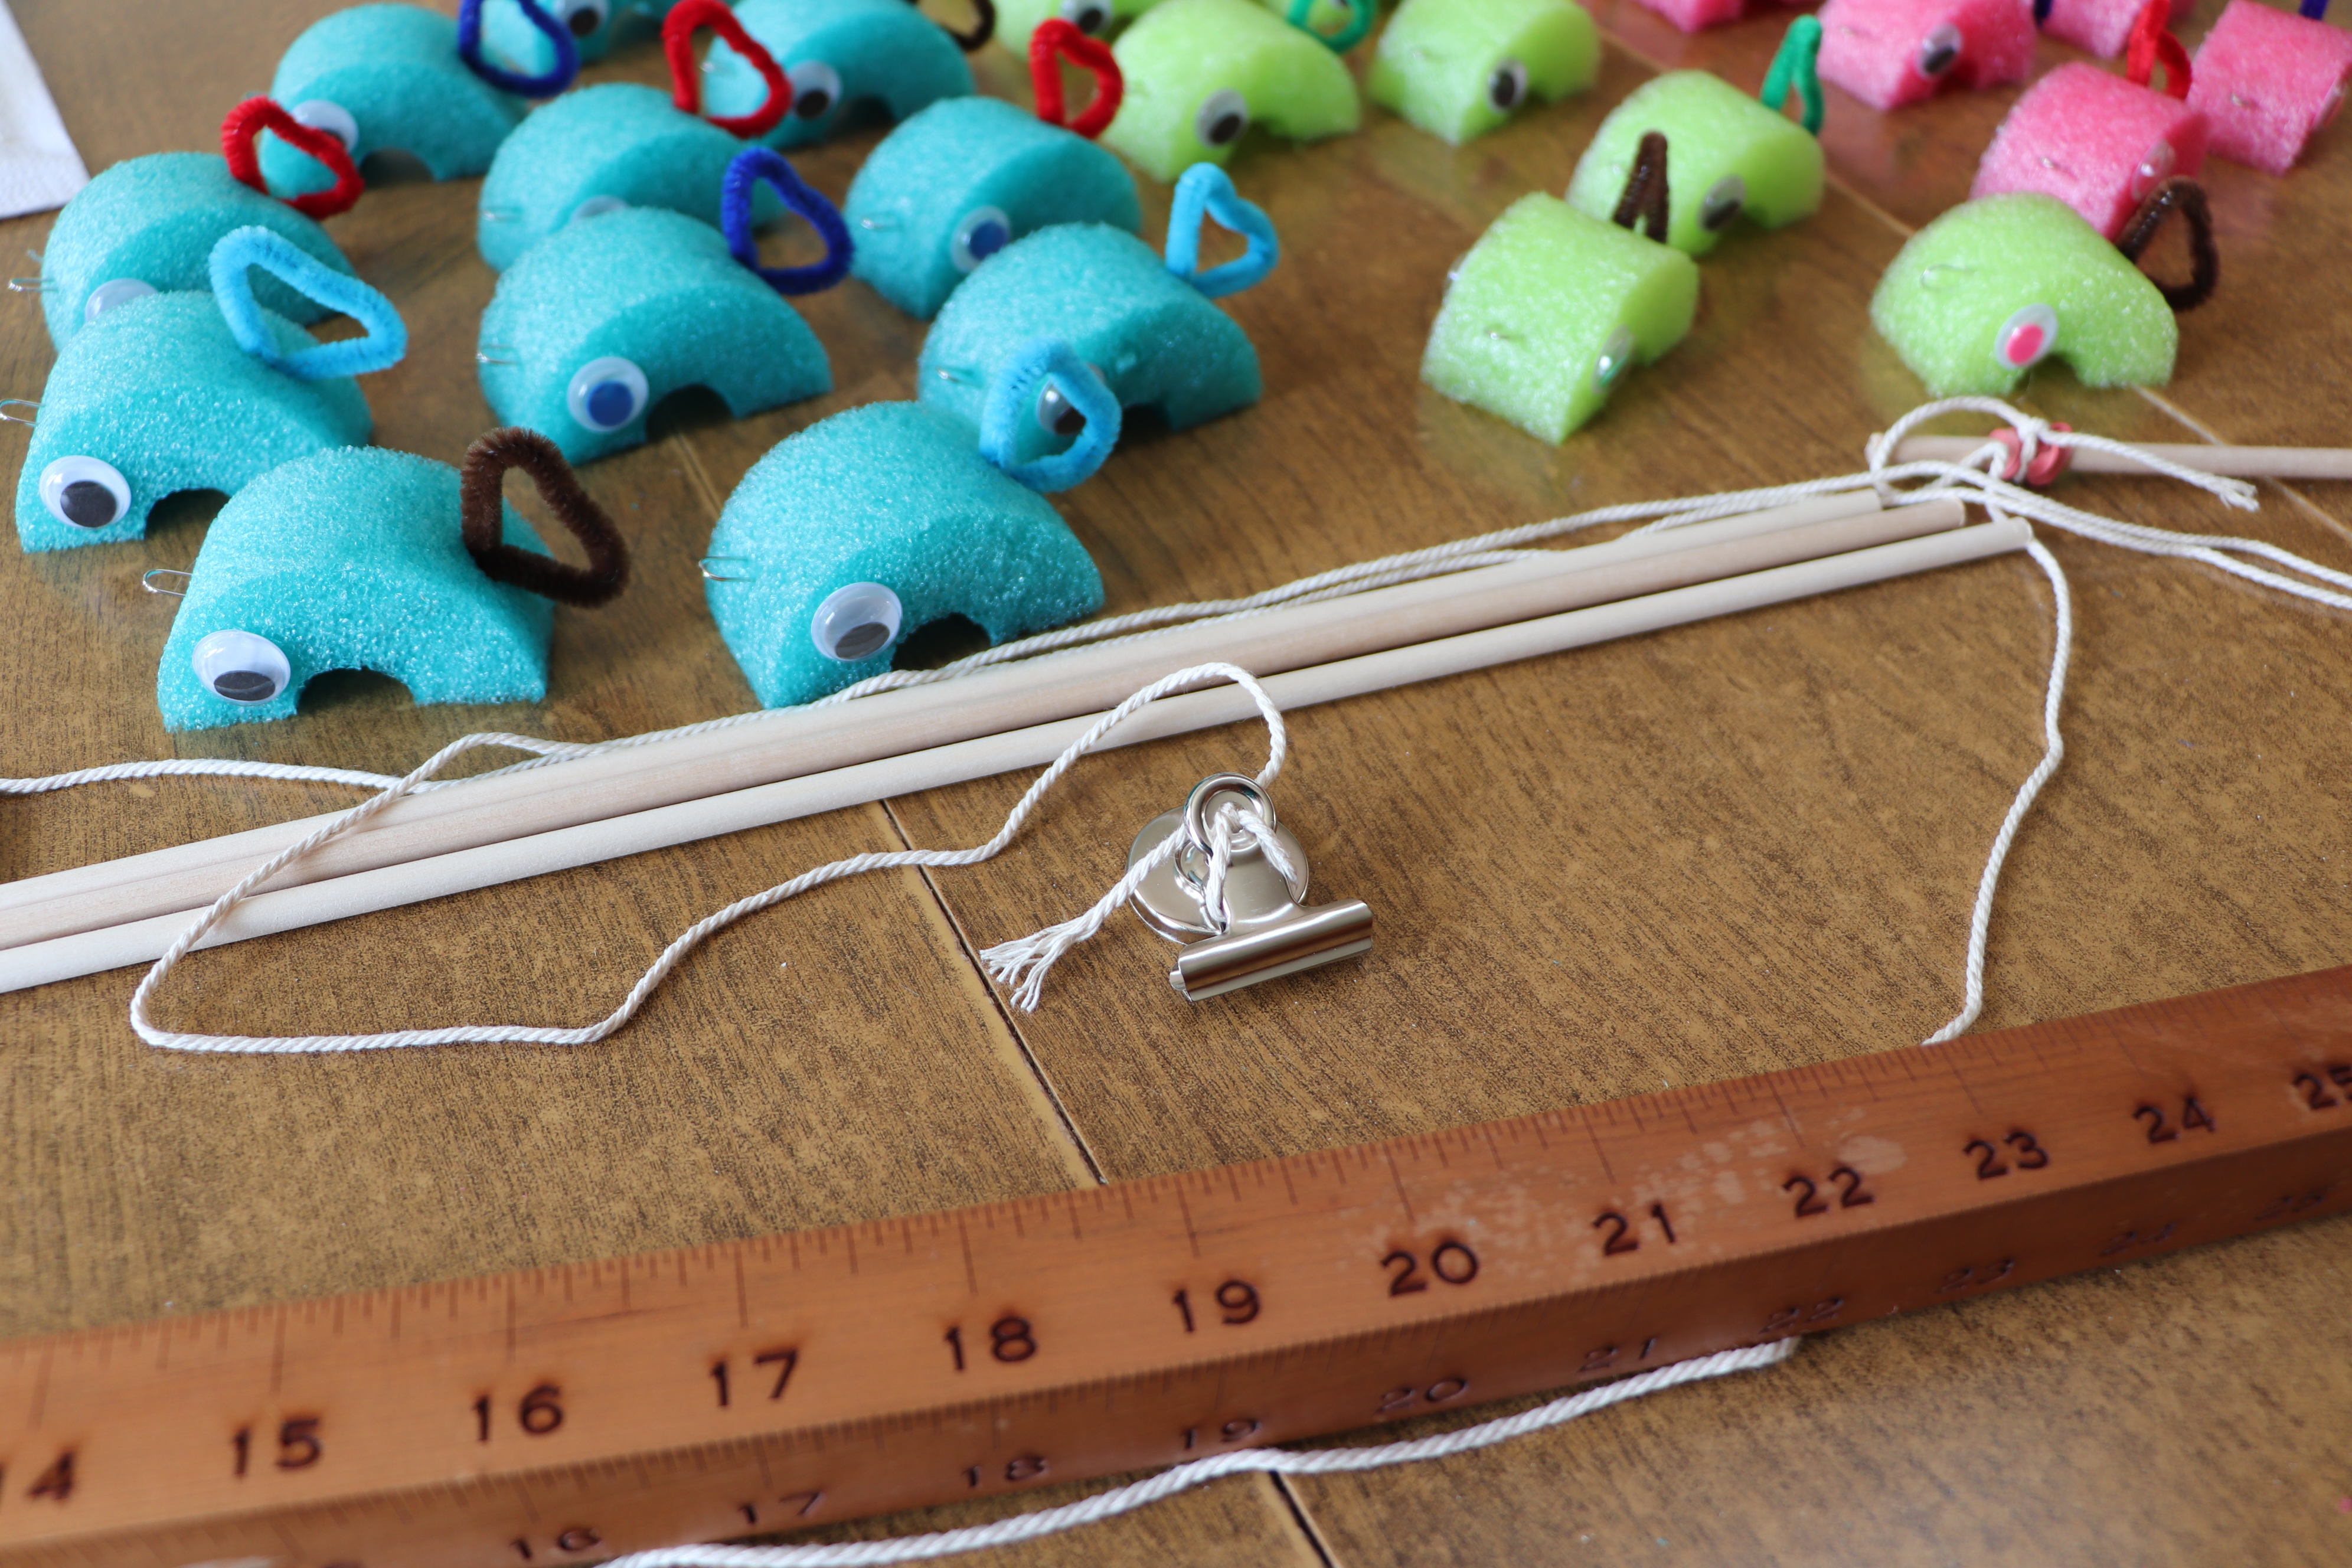
This activity involves fishing for pool noodle fish in a kiddie pool with real water, using a fishing pole with a magnet that attaches to a paper clip on the fish. Prizes may be awarded to participants who catch a certain amount or color of fish, or to those who merely attempt to fish. 😉
Here's how to make the fish and set up the activity:
1. Gather supplies.
For 36 fish, you will need:
3 pool noodles, each a different color (or more than 3 noodles, if you want more than 3 colors of fish)
36 small metal paper clips
72 googly eyes
12 pipe cleaners, can be various colors
For 4 fishing poles, you will need:
4 wooden 1/4-inch dowels, about 30 inches long (I purchased marshmallow roasting sticks from Walmart for this)
4 medium-sized wide rubber bands (the kind around produce such as broccoli works well)
5 yards kitchen string
4 round refrigerator magnets (it's best if they have something on which to attach the string easily - mine had clips with little holes in them to thread the string through)
paints or markers (if you choose to incorporate the Fishing Fun instructions in the game)
Tools:
sharp knife
cutting board
ruler
hot glue gun
paint brush, if using paints
Needed on the activity site:
completed fish
completed poles
candy bags or other goodies, if incorporating prizes with the activity (I used gummy sharks, in line with the fishing theme)
Fishing Fun instructions to display, if you're going that route
kiddie pool (if you don't own a pool, hopefully you have a friend like I do who is willing to lend you hers)
bucket or container for fishers to place their catch into as they fish for the desired amount (optional)
tarp or blanket to place under the pool for protection before filling with water, if the location is gravel or asphalt
water source for filling the pool
2. Using a sharp knife, cut the pool noodles into 1.5 inch slices. For 36 fish, you will need 6 slices of each color (if using 3 colors).
3. Cut each pool noodle slice in half across the diameter. This half slice will be the main body of the fish.
4. For the fish tails, cut the pipe cleaners into 4-inch lengths. Shape each length into a loop, and twist the ends together twice, leaving a slight overlap of wire. Bend the loop in slightly to form a key shape. Pinch the two overlapping ends of wire together, making a short piece to poke into the fish for its tail. You may need to make a little cut in the noodle with the knife first, to help with this. (I think I figured out the knife cut wasn't needed on mine, though.)
5. Poke a paper clip into the mouth end of the fish. This will be the attraction piece for the magnet, and make it possible for the fisher to catch the fish.
6. Use the glue gun to fasten a googly eye on each side of the fish's head near the mouth.
7. For the pole, wrap a rubber band around one end of the dowel to make a non-slip place on which to tie a piece of string that's about 3 feet long. At the other end of the string, tie on a magnet for the fish "bait". If you plan to color code your poles, use paint or markers to color a section of each pole with a different color at this point.
8. If you plan to use the Fishing Fun instructions (especially for the older children in your group of participants), figure out how you want to display the rules. Here are some ideas for the instructions, according to pole color:
Green pole - fish for any number of fish, any color you choose
Blue pole - catch as many fish as how many years old you are
Black pole - catch 3 fish of each color
Red pole - fish blindfolded, for as many fish as you wish and any color
Note - I thought these instructions were a great idea to begin with, but I found out that at the actual event, the children just wanted to fish and they didn't want to wait around for a certain color pole or a special set of instructions!
9. At the event, put down the blanket or tarp for protection, if needed, before placing the pool and filling it with water. Float the fish, and prepare the poles, instructions and prizes for the young fishers to come and participate in your activity.
📷 Jacie Horst
📷 Jacie Horst
10. Welcome the fishing participants, and assist them as needed. Hand out prizes to happy little fishers.
Mystery Photos
It’s
a tradition at our annual church camping to have members of the social
committee provide guessing games or puzzles of some sort for campers to solve
over the course of the weekend. This year, I chose to contribute a Mystery
Photo contest, in which people could view sixteen close-up photos and guess
what objects the pictures represented. The photo subjects were different items found
around our house and property. A candy prize went to the person who had the
most correct guesses. Some of the adults (more women than men) were intrigued enough
to pore over the puzzling perspectives, but a group of children hung around the
photo board, too. I was actually surprised at the level of interest coming from
the younger set of campers in figuring out what the objects were. An
11-year-old boy ended up winning the chocolates by identifying fifteen of the sixteen
photos correctly!
Photo Scavenger Hunt
Ken
and I were in charge of organizing a few group activities at the aforementioned
church camping. One of those activities also involved photos, but this time the
participants took the photos instead of trying to decipher pictures that I had
taken. In the Photo Scavenger Hunt, we divided the group into six-person teams who raced to get ten photos of different descriptions.
Following is a
list of the photo descriptions, as well as the instructions each team was given
at the onset of the activity. Prizes (again, candy or apple chips) were awarded
to both the team to finish first and the one most creative.
Note: Anyone in your group may take any of the photos, but
all your team’s photos need to be taken on one device. When the instructions
indicate using your whole team or group in a photo, the person taking the photo
is exempted unless specified otherwise. You may take the photos any order you
like, but your team will need to present all of the photos to the judges to
qualify for winning. First group to finish the list, wins.
Take a (separate) photo of:
- Your
group all standing on a picnic table in order of age
- Everyone
in your group touching the same tree
- Your
whole team with one person in the group holding a live, non-human creature
(big enough to identify in the pic)
- Your
group beside a tepee you have built of twigs
- Your
group holding hands circling the main fire pit
- Four
people from your team in the same photo, each with a ball in the air above
them (no one touching the ball)
- At
least four people in your group simultaneously doing at least two of these
activities: standing on your head, turning a cartwheel, doing a push up,
or juggling three or more items
- Each
person in your group holding an object that starts with the initial of
their first name
- Choose
a 5-letter name for your team. Using all the people in your group to shape
the letters, spell out your team’s name in a photo.
- Take
a selfie with all of you on the pic, including the photographer

📷 Sasha Tsikalo
📷 Kenton Shantz
Four Stations (Bible Character Studies)
Once a month during
the summer our church has a Wednesday evening service called All Ages
Participation Evening. Last month, Ken and I hosted the meeting in our home,
and I designed this activity which invited people of any age to join in
studying Bible characters. The group of participants was divided into smaller
groups of five or six people. Each group was given a card which told them the
name of a Bible character (and the scripture references where the character’s
story is found) to study during the evening. The groups had 8-10 minutes at
each station to follow instructions and prepare to present something to the
main assembly after each group had been at all four stations.
STATION #1: TWO TRUTHS & ONE LIE
Write down two factual statements and one
false statement about your Bible character. Be prepared to share the statements
later with the whole group and to have someone in the audience guess which one
is the lie.
STATION #2: DISCUSSION QUESTIONS
Note: Have one person from
your team write the answers on a paper for everyone in your group.
Discussion questions for Station #2:
- What was your character’s age (or
stage in life), and where did they live?
- Who were some key family members
or main characters in their lives?
- What are some challenges your
character faced in their life?
- How did your character respond to
God (or His ways) in their challenges?
- Why do you think God put this
character’s story in the Bible?
- What is one way you want to be
like this person in your own life?
Try to answer the list of
questions about your Bible character, but focus especially on #6. Later, each
of you will have the opportunity to share with the whole assembly something you
learned from your Bible character, or one way you want to be like him/her.
STATION #3: ACTING OUT A SCENE
Prepare to act out a scene from the story of your Bible
character to help the entire assembly guess who your character is.
STATION #4: COMPOSING CHANT, SONG, or POEM
Make up a chant, a song (you may use a familiar tune), or a
short poem containing a quote or part of a quote from your Bible character and
be prepared to “perform” it for the whole group later.
Some observations I made regarding the
activity:
It is harder than you’d expect to pick out
the one false statement out of three statements about a familiar Bible
character. (It’s true, after all, that Elijah killed the prophets of Baal
beside the brook Kishon, but it is not true that he went up to heaven in a
chariot of fire.)
It takes more than 8-10 minutes to do justice
to all the questions presented at Station #2.
When you have a diminutive Queen Esther, (and
her props come from a toy box) her crown may have a tendency to slip off easily
and she may have trouble walking to King Ahasuerus without tripping over her
high heels.
A song-composing group can be so focused on
creativity that they forget to include their Bible character’s quote in their
song. Still, who could fault them? I mean, how cool is this: “Only a boy named
Joseph…and one little cup went in the sack, and the trip went round and round…”
😊

Note to locals: If any of you are interested in borrowing the fish and fishing poles, or the Mystery Photos posters (photo board of close-up photos and answer key board of actual photos), let me know, and I'll be happy to arrange for lending them to you.


.jpg)
